
Step-by-step setup · Updated November 2, 2026
Set up GreetReviews and share your Google review page
Create a free branded review page, test your Google destination, and share its link or QR code. Real settings and preview screenshots explain publishing and what activity reports measure.
Explore GreetReviews features and screenshots or create a free GreetMode account.
1. Choose the business and its Google review link
Create a free account or sign in, add your business in Your sites, and choose its GreetReviews workspace under Manage products. No credit card or paid product is required. Use the correct business or location before copying a link or QR code.
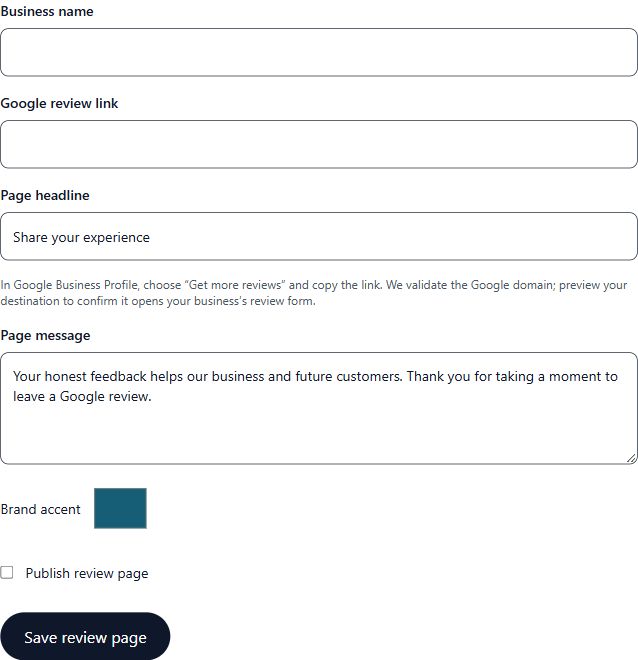
In Settings, enter the business name and Google review link. In your Google Business Profile, open Read reviews, choose Get more reviews and copy the review link. Paste that destination rather than a general Google search URL. GreetReviews checks the Google domain; you must still confirm it opens the correct business.
Google’s review-link instructions →Choose the page headline, message and brand accent. Ask for an honest account of the experience, without asking for a particular rating.
2. Preview, publish and test the destination
Use Preview branded page to check your text and layout. When the page is ready, select Publish review page and Save review page. Your hosted link and QR code work after publication. Sharing the hosted page does not require adding a JavaScript snippet to your website.
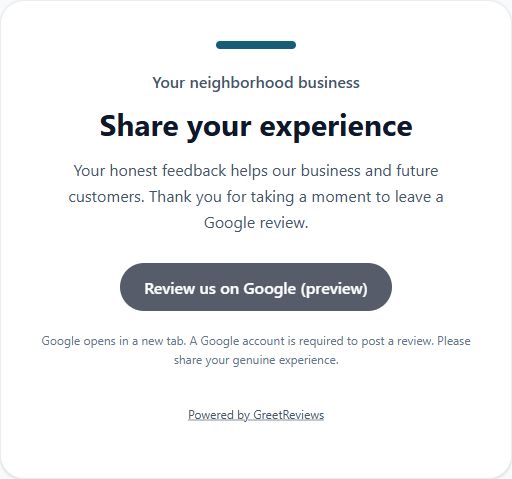
Open your published page in a private browser window and on a phone. Confirm that the Google button opens the review form for your business in a new tab. A customer needs a Google account to post; GreetReviews does not write or submit the review for them.
4. Interpret the activity report accurately
Refresh activity in Settings to review the last 30 days in UTC. Page views, QR page views and Google clicks describe recorded activity. QR page views are included in total page views; do not add them together as separate audiences.
These are not unique customer counts or verified posted Google reviews. Repeat visits and automated traffic can affect them. Check Google Business Profile itself to see posted reviews and reply to customers there. GreetReviews stores daily aggregate activity, not the customer’s Google review text.
Export activity CSV if you need the recorded daily report elsewhere, and keep downloaded business reports private. A zero count means no recorded activity in that report, not proof that the page is broken.
Explore GreetReviews features and screenshots →